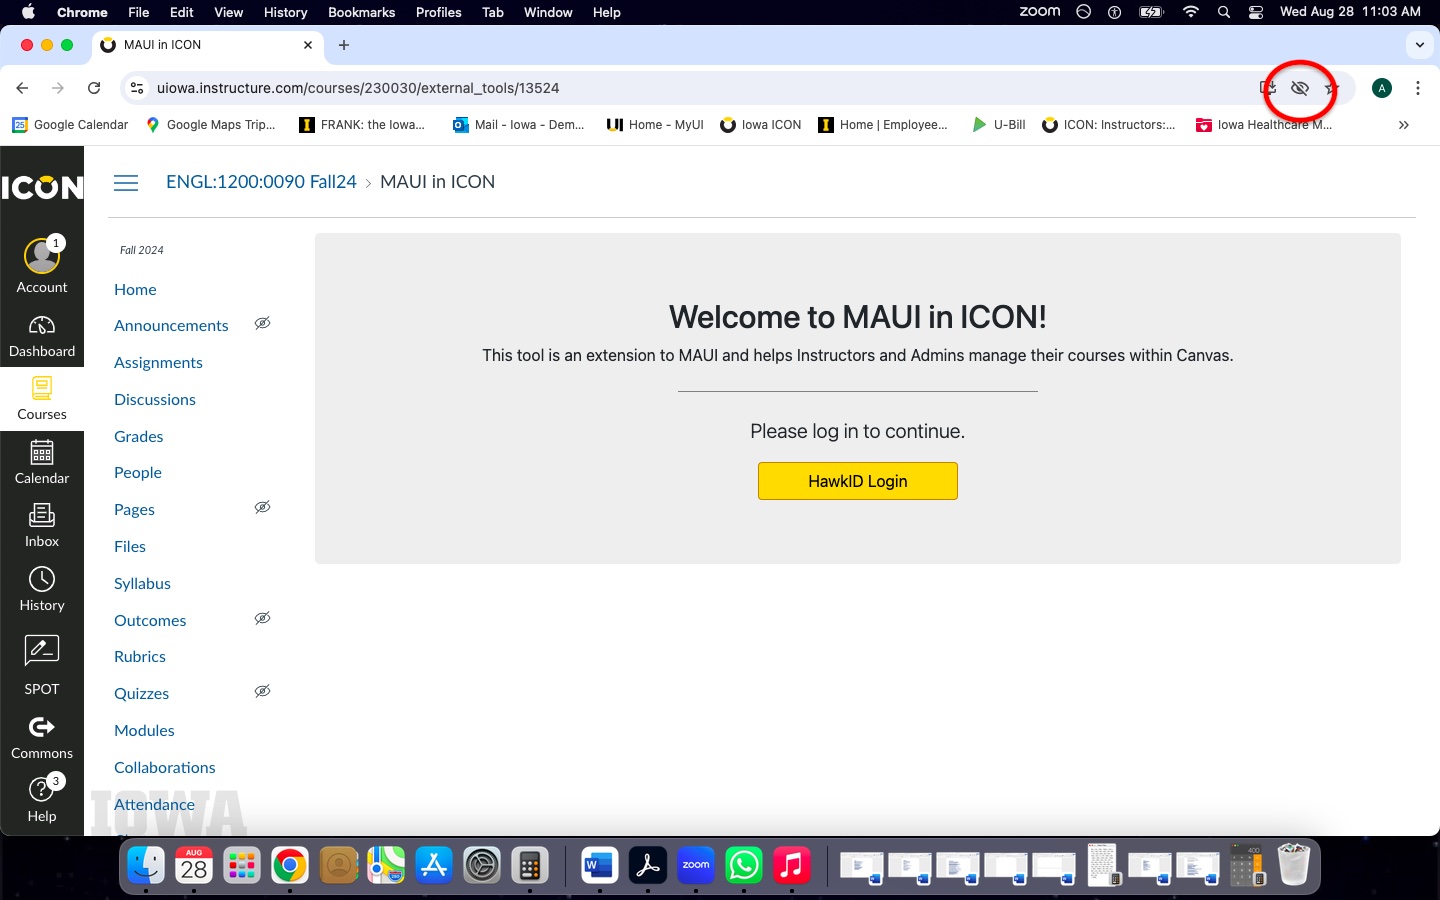
Welcome to Maui in ICON
MAUI in ICON is an application that gives instructors a simplified view of MAUI directly inside their ICON site to help manage their course. Features useful to instructors at the start of the semester have been included here such as those that help to combine course sections and those that help familiarize the instructor(s) with students in the classroom. Some features of the application included here are student name pronunciation, preferred pronouns, emailing the class-list, photo, and student's primary program of study.
MAUI and ICON Permissions
Only approved courses that are created in MAUI can use this tool. Instructors should reach out to their Academic Departmental Administrator to make changes to instructor roles in MAUI.
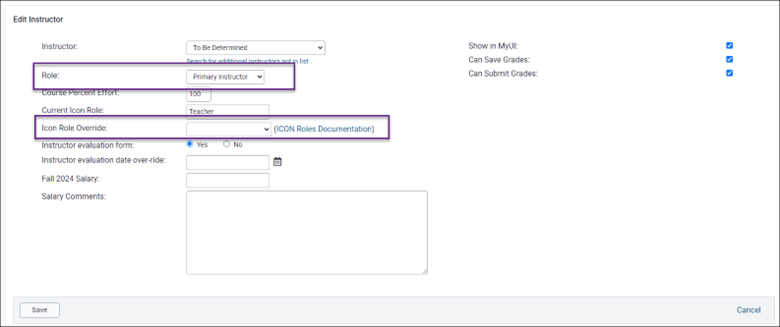
Primary Instructors, Course Supervisors, and Team Teachers Instructor Roles
- "Teacher" As a Current Role in ICON: You will be able to access all MAUI in ICON tool features in the course, including the Class List (with SDS letters), SDS Summary page, and the Course Combiner.
Teaching Assistant (TA) Instructor Role
- With Teaching Assistant as a Current ICON Role: Then you will be able to access the MAUI in ICON tool but will NOT have access to MAUI in ICON tools.
- With “Teacher” as "Icon Role Override Status", then you will be a Teacher in the ICON course and you will be able to access all MAUI in ICON tools including Class List (with SDS letters), SDS Summary page, and the Course Combiner.
- If the Teacher or TA has the proper permissions above to ALL sections of that are combined together, they will have full access to the MAUI in ICON tool.
- If the Teacher or TA has some permissions to some sections but not all, they will be prompted to select the sections that they do have proper access to in the MAUI in ICON tool.
Course Combiner
Previously you could only Combine or "Cross List" courses in ICON using a process described on the Canvas website. This process has been simplified using the MAUI in ICON tool. As an instructor you can click on the Course Combiner menu item, and it will show you all of the courses that you are enrolled as the Teacher. To combine the courses on the right column with the current course you are viewing shown on the left, click and drag them from the right column to the left column. Then click the Combine button. Drag the course from the left column to the right column to uncombine. In the upper right corner you can search for courses from either the current semester or other semesters using the drop down menu to combine into your course.

Features of Course Combiner:
- Displays the Instructor(s) of the course as well as the number of students enrolled for the course you are viewing.
- If you have a large number of courses this Search box can help you locate them. When you type in content here the available courses with that criteria will list out in right column in the picture above, labeled as 5.
- This dropdown menu allows you to view previous or future semesters. The course list from that semester will display in the right column above, labeled as 5.
- This shows the course that you are currently viewing in ICON, which is greyed out. This course cannot be uncombined. Any other courses here in white are courses that have already been mapped to the current course.
- These are courses that are available to be combined into the current course. The courses that are already combined (and the current course you are in) are greyed out. The courses that show as white are available to be combined to the course list on the left.
- If a TA is listed as an instructor of some sections, but not others, they will not be able to access Course Combiner for that class.
How to Combine Courses:
- Click and drag the course you wish to combine from the right column and drop it into to the left column.
- A confirmation message will pop up saying this was done.
- You will now see the course on the left column as white and it will be in grey on the right.

How to Uncombine Courses:
- Click and drag the course you wish to uncombine from the left column and drop it into the right column.
- A confirmation message will pop up saying this was done.
- You will now see the course on the right column as white and it will no longer show up on the left column.

MAUI Class Lists
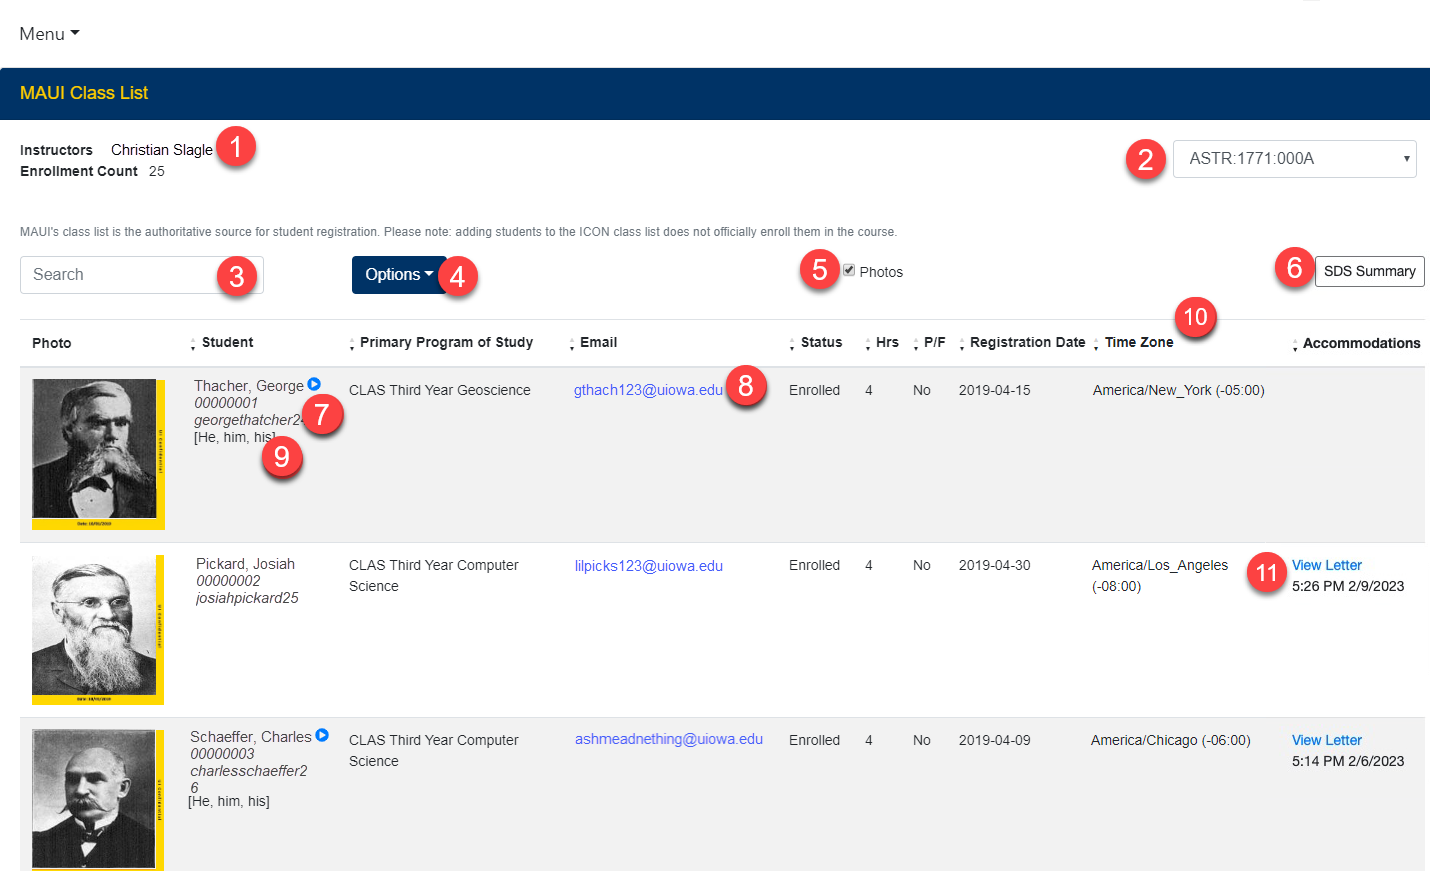
Class List Features:
- General information about the class including the Instructor name and how many students are enrolled in the class.
- Dropdown menu of all of the sections that have been combined within ICON.
- A search bar to search for a student using their specific information, ie name or email address.
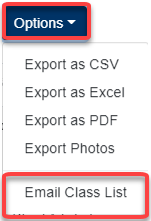
- In the Options Menu is where you export/download the class list. Your options for download are the .CSV (comma separated values), Excel, PDF or Photos for the export. This menu is also where you will find the Email Class List option.
- Checkbox to show the student photos in the class list. In the example above the box is checked so you can see the photos for the students.
- Student Disability Services (SDS), SDS Summary button that brings you to the SDS Summary tab for the course where you can sort by accommodation(s), view Letters of Accommodation(s) (LOA), export data to spreadsheet, and email students.
- The name pronunciation service, Lingo, provides an option for students to record themselves pronouncing their names so that it can be played back. https://www.dna.its.uiowa.edu/lingo/home/recordmic
- The email address of the student is listed here. You can click on it to send the student a direct email from your default email application.
- Displays the students preferred pronouns.
- Displays the time zone that the student has set for their ICON profile.
- Displays a date/time stamped hyperlink of a SDS Letter of Accommodation(s) (LOA) if the student has requested accommodation(s) in your course.
Student Disability Services Summary Tab
SDS Summary Tab
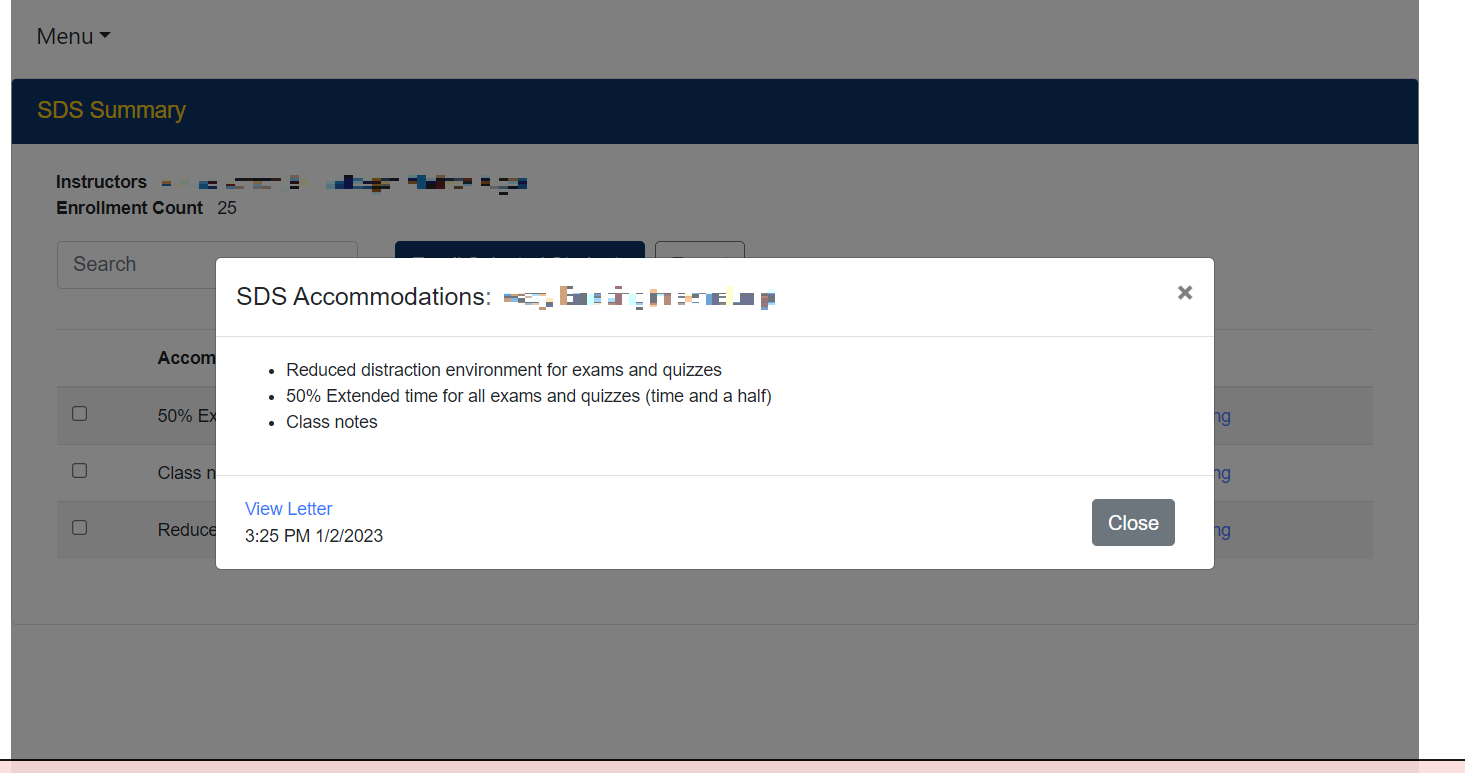
The SDS Summary tab lets instructors review what accommodation(s) have been requested by students in their courses.
The summary lists accommodations such as:
- Extended Time
- Disability Related Absences and Deadline Modification (DRADM)
- Class Notes
- Reduced Distraction Environment for Exams and Quizzes
- Allow Audio recording of class
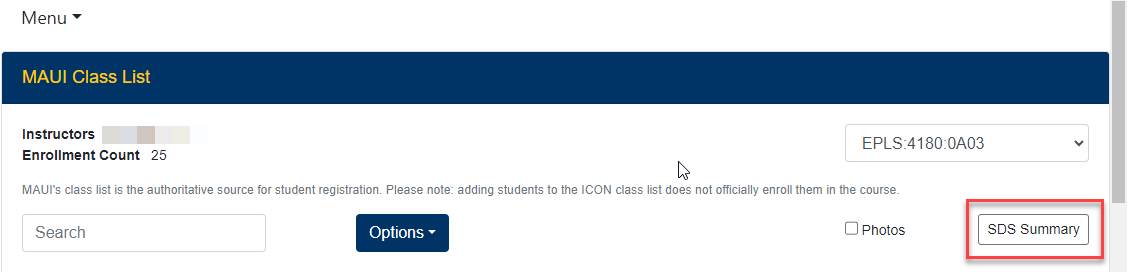
To access this information, go to the Navigation menu to the left of your ICON site and click MAUI in ICON.
Then navigate to the Class List in the top left drop-down menu, and click the SDS Summary button on the Class List page.
On this page you can:
- Sort by accommodation(s)
- View Letters of Accommodations (LOA) by clicking the students name
- Export data to spreadsheet using the export button
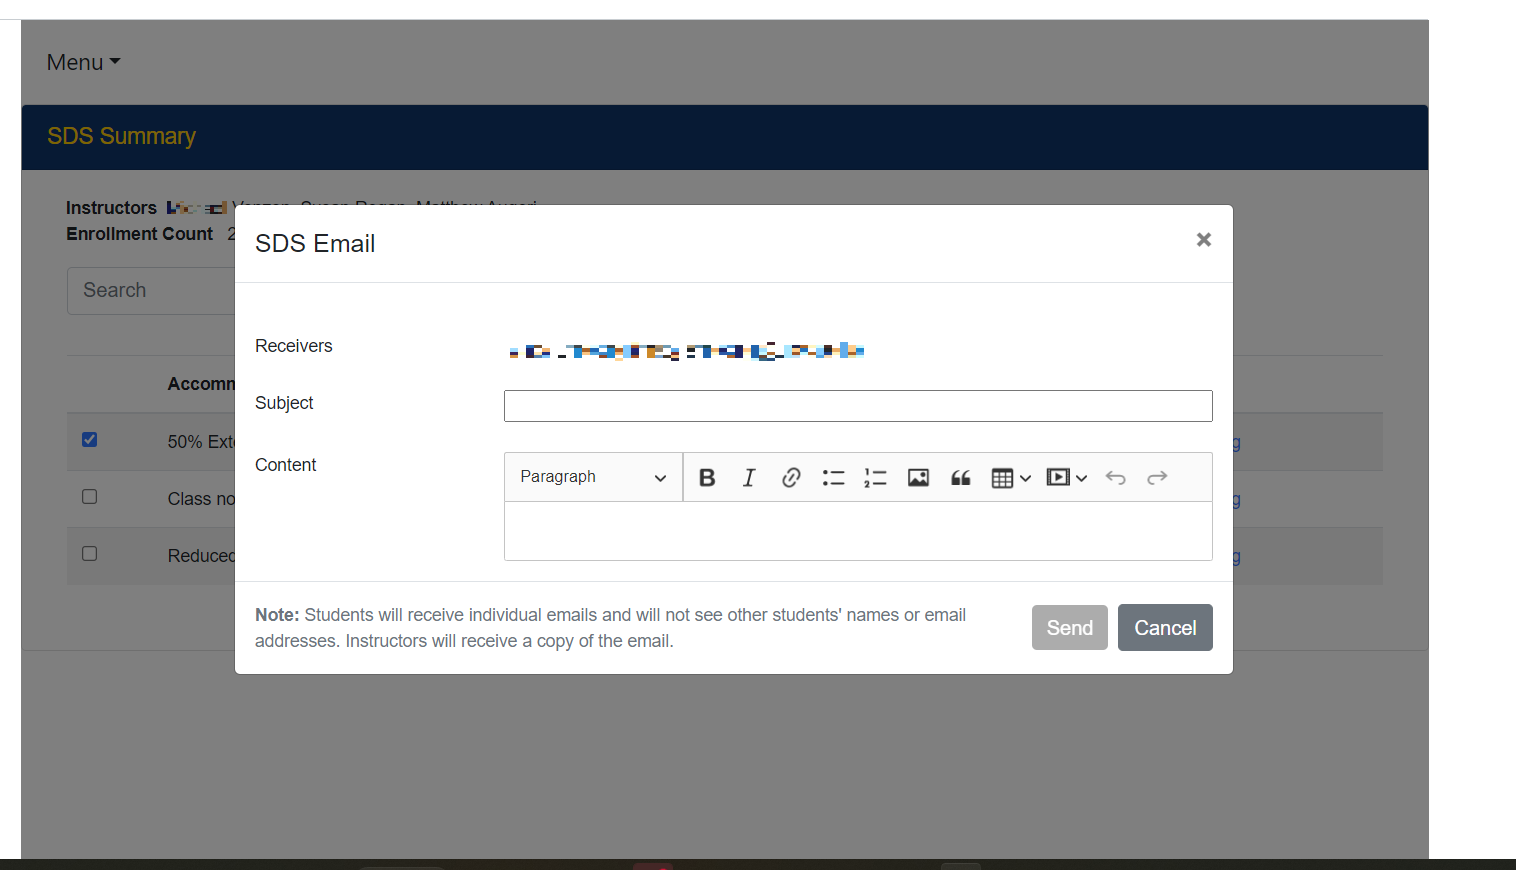
- You can select groups of students to email by clicking the box next to that accommodation, then clicking Email Selected Students.
Display of Student's Time Zone
When students are working from remote locations, it is helpful for the Instructor to know their time zones, as this can be helpful in scheduling more convenient meeting times or activity deadlines. When an ICON user sets their time zone preference for their ICON profile, then the MAUI in ICON tool has the “Time Zone” column that shows the instructor what time zone the student has set.
Students can set their time zones in ICON.
Sending Emails
Instructors who wish to email their class from their ICON course can use the email feature from the options menu within the MAUI in ICON application:
Email Features
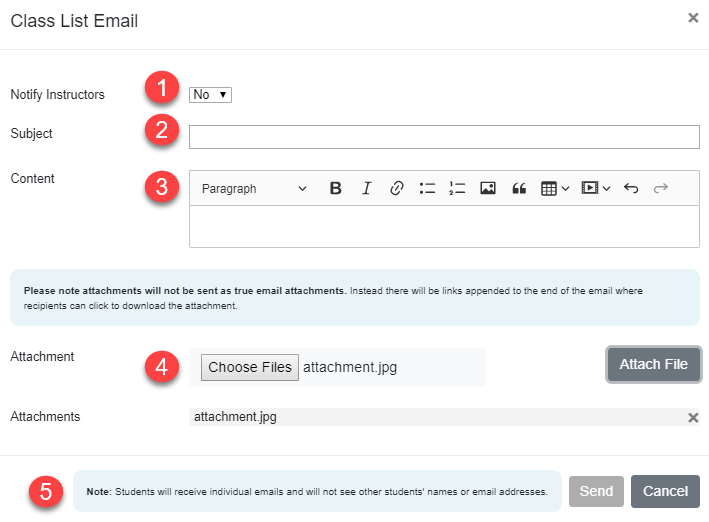
- An ICON course does not need to be published in order for email messages to be sent out. Emails can be sent to only one section at a time despite cross listing multiple courses into one site.
- Choose to include the instructors of your course alongside students in your class email.
- Title your message with an appropriate subject header.
- Insert your message description using the rich content editor. Edit the content using links, tables, media, and special formatting.
- Append files to your message for individuals to download. These items will be sent to the recipients as links rather than as true attachments.
- Emails sent to the class will be sent out to students individually, so other students' names or email addresses will not be shared.
- Sent emails can be found in the individual sender's Outlook sent email folder. (re-word as needed and if possible add to MAUI Sending Emails through the class list
Sending Emails Through the Class List
Instructors who wish to email their class from their ICON course can use the email feature from the options menu within the MAUI in ICON application:
- Select the Options drop-menu
- Choose Email Class List.
Email Class List Features:
An ICON course does not need to be published in order for email messages to be sent out. Emails can be sent to only one section at a time despite cross listing multiple courses into one site.
- Choose to include the instructors of your course alongside students in your class email.
- Title your message with an appropriate subject header.
- Insert your message description using the rich content editor. Edit the content using links, tables, media, and special formatting.
- Append files to your message for individuals to download. These items will be sent to the recipients as links rather than as true attachments.
- Emails sent to the class will be sent out to students individually, so other students' names or email addresses will not be shared.
Exporting Grades to MAUI
Note: This process was formerly completed using the Export final grades to MAUI tool in ICON. If you prefer, you can also export ICON grades as a CSV file to upload to MAUI.
You can't export grades for a zero-credit hour course. Grade exports must be matched to a credit-earning course or section.
- Verify that you have the correct grades and grading scheme set in the course (review How to enable a grading scheme for a course).
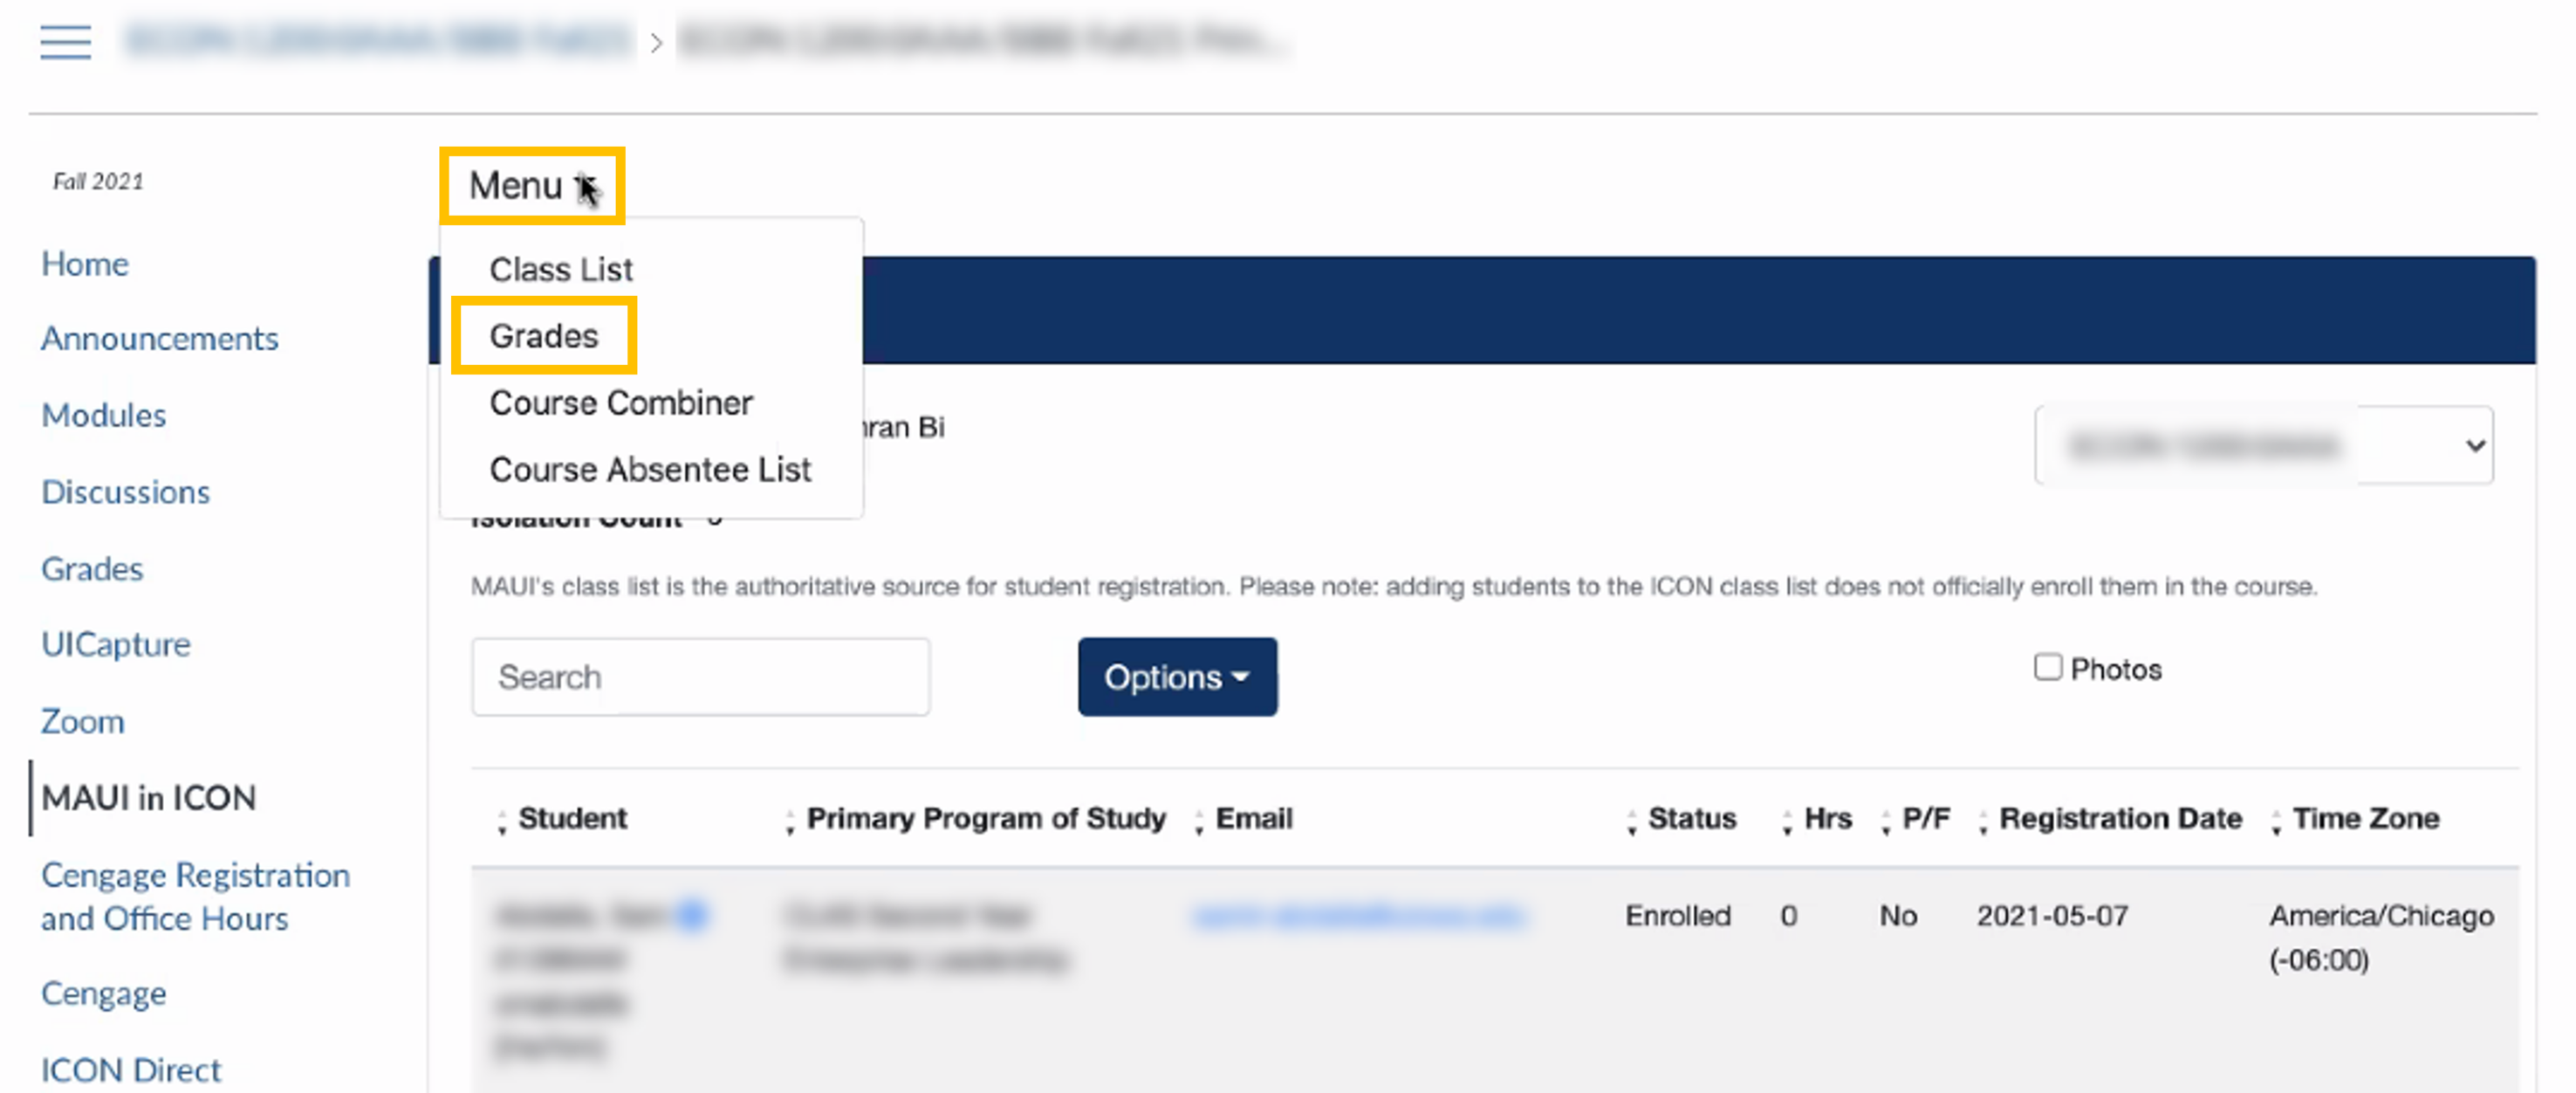
- Click MAUI in ICON.
- Click Menu and then Grades.
Note: If the MAUI login page does not load you may have a pop-up blocker enabled on your web browser.
If you are using the Chrome browser, you will get an icon on the top right of the address bar. You can click on the icon and select the "Always allow pop-ups and redirects from https://uiowa.instructure.com" radio button, then click Done, see image below. You may have to refresh the page after clicking Done.
- If prompted to log in, enter your HawkID and password. If you are unable or not prompted to log in, open a new tab and log in to ICON using your HawkID and password.
- MAUI will open in a new tab. Ensure that popups are enabled. If you encounter the MAUI homepage and not the ICON Grade Import page for this class, please try clicking on MAUI in ICON again after logging in.
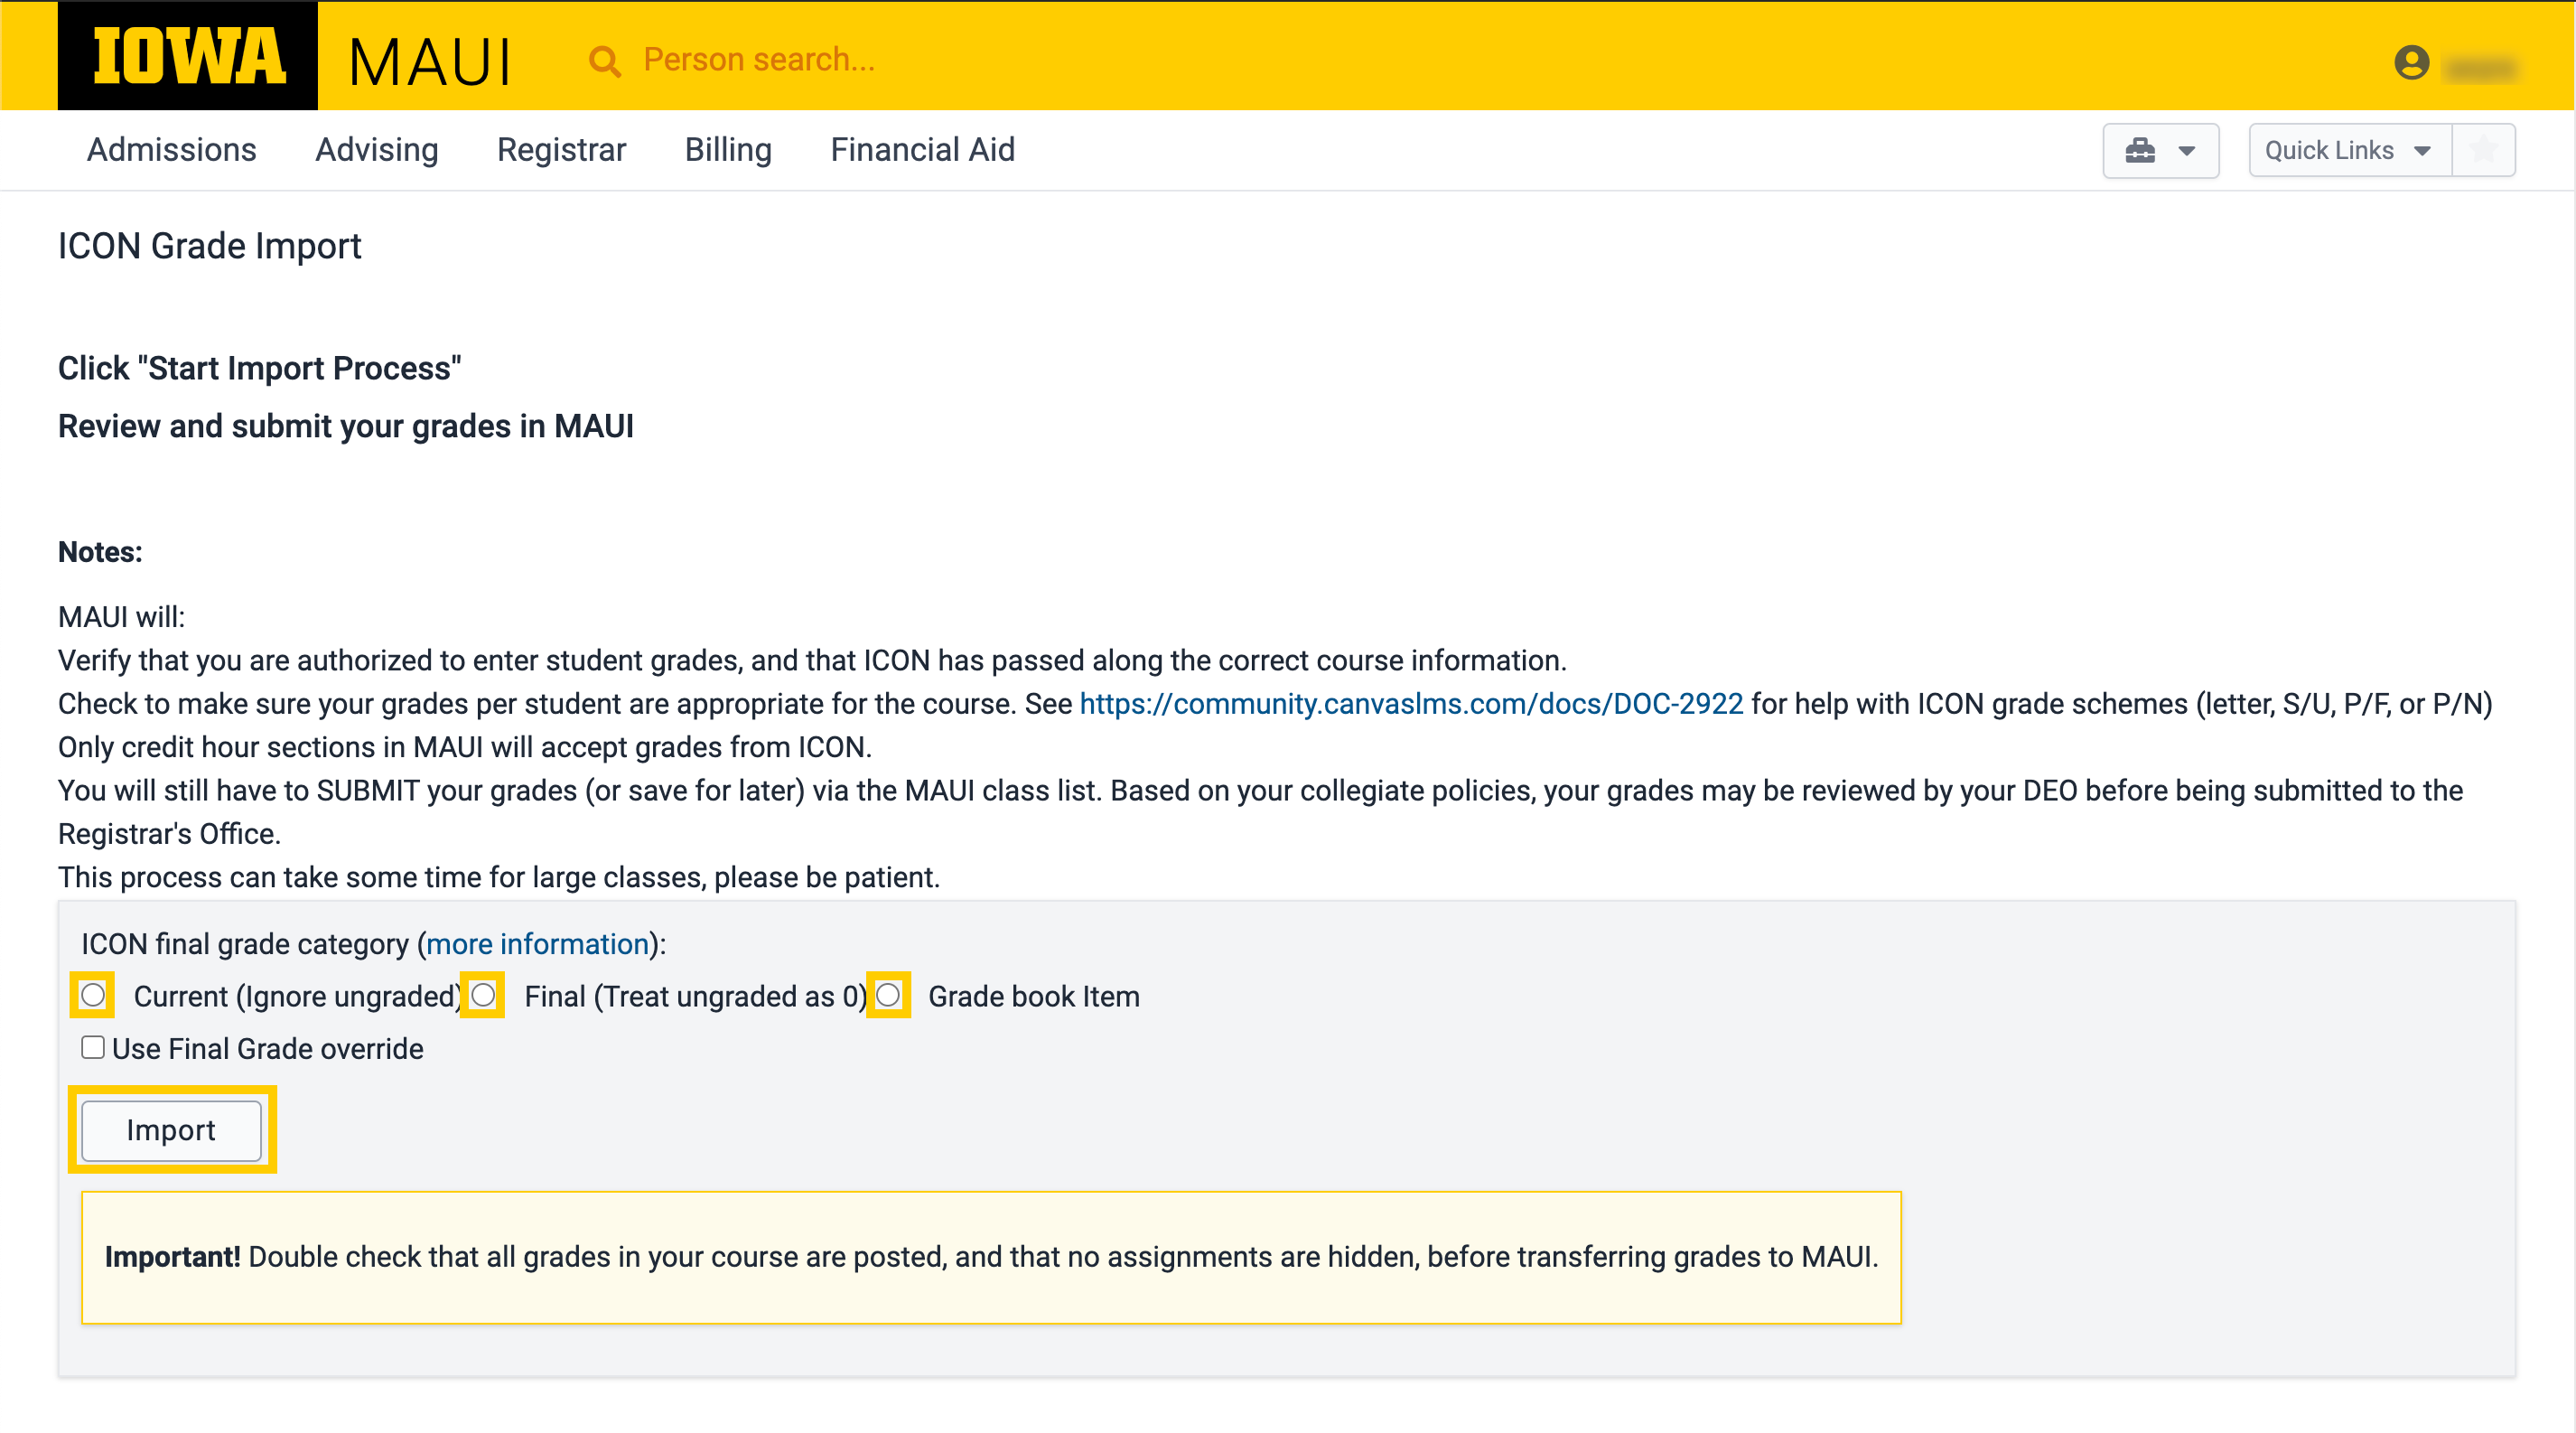
- Choose what to Import (Current - ignores ungraded, Final - treats ungraded as zero, or Gradebook item - choose a column from the Gradebook to import).
- Click Import.
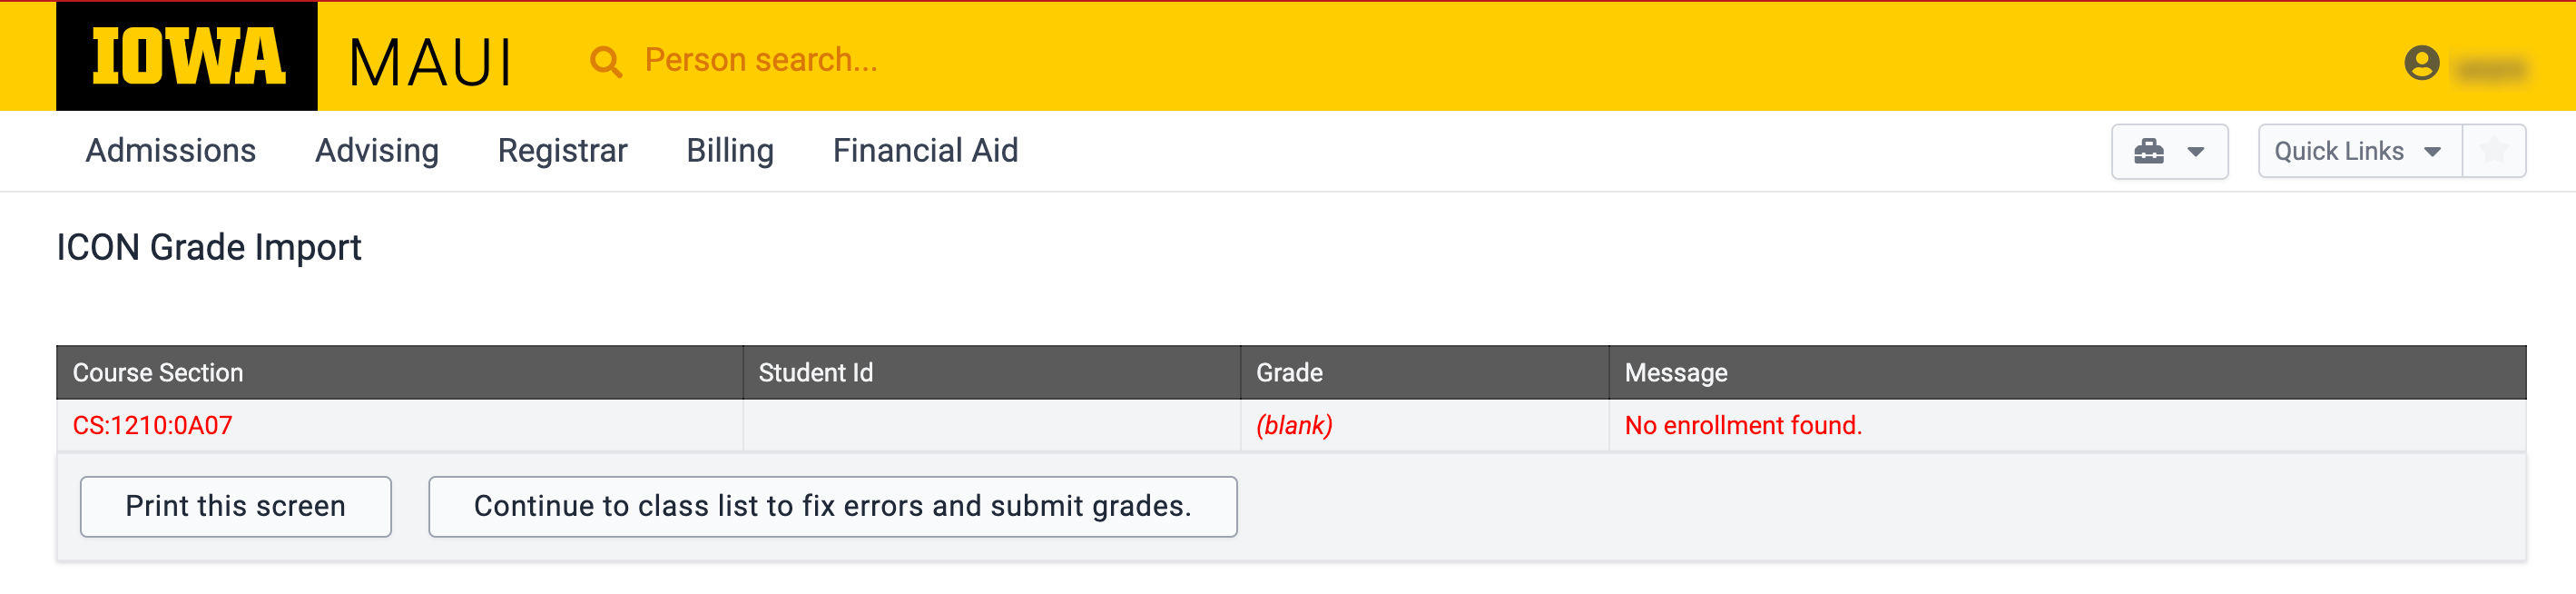
- If you get the screen below, check to see if you have a Grade Scheme Selected on your ICON course's Settings page.
- You will then see a view of a successful import to MAUI with Test Student enrolled. It is not necessary to remove Test Student from the list of students, but if you would like to learn how to remove any instances of Test Student, see the How to Remove the Test Student from your ICON Gradebook section below.
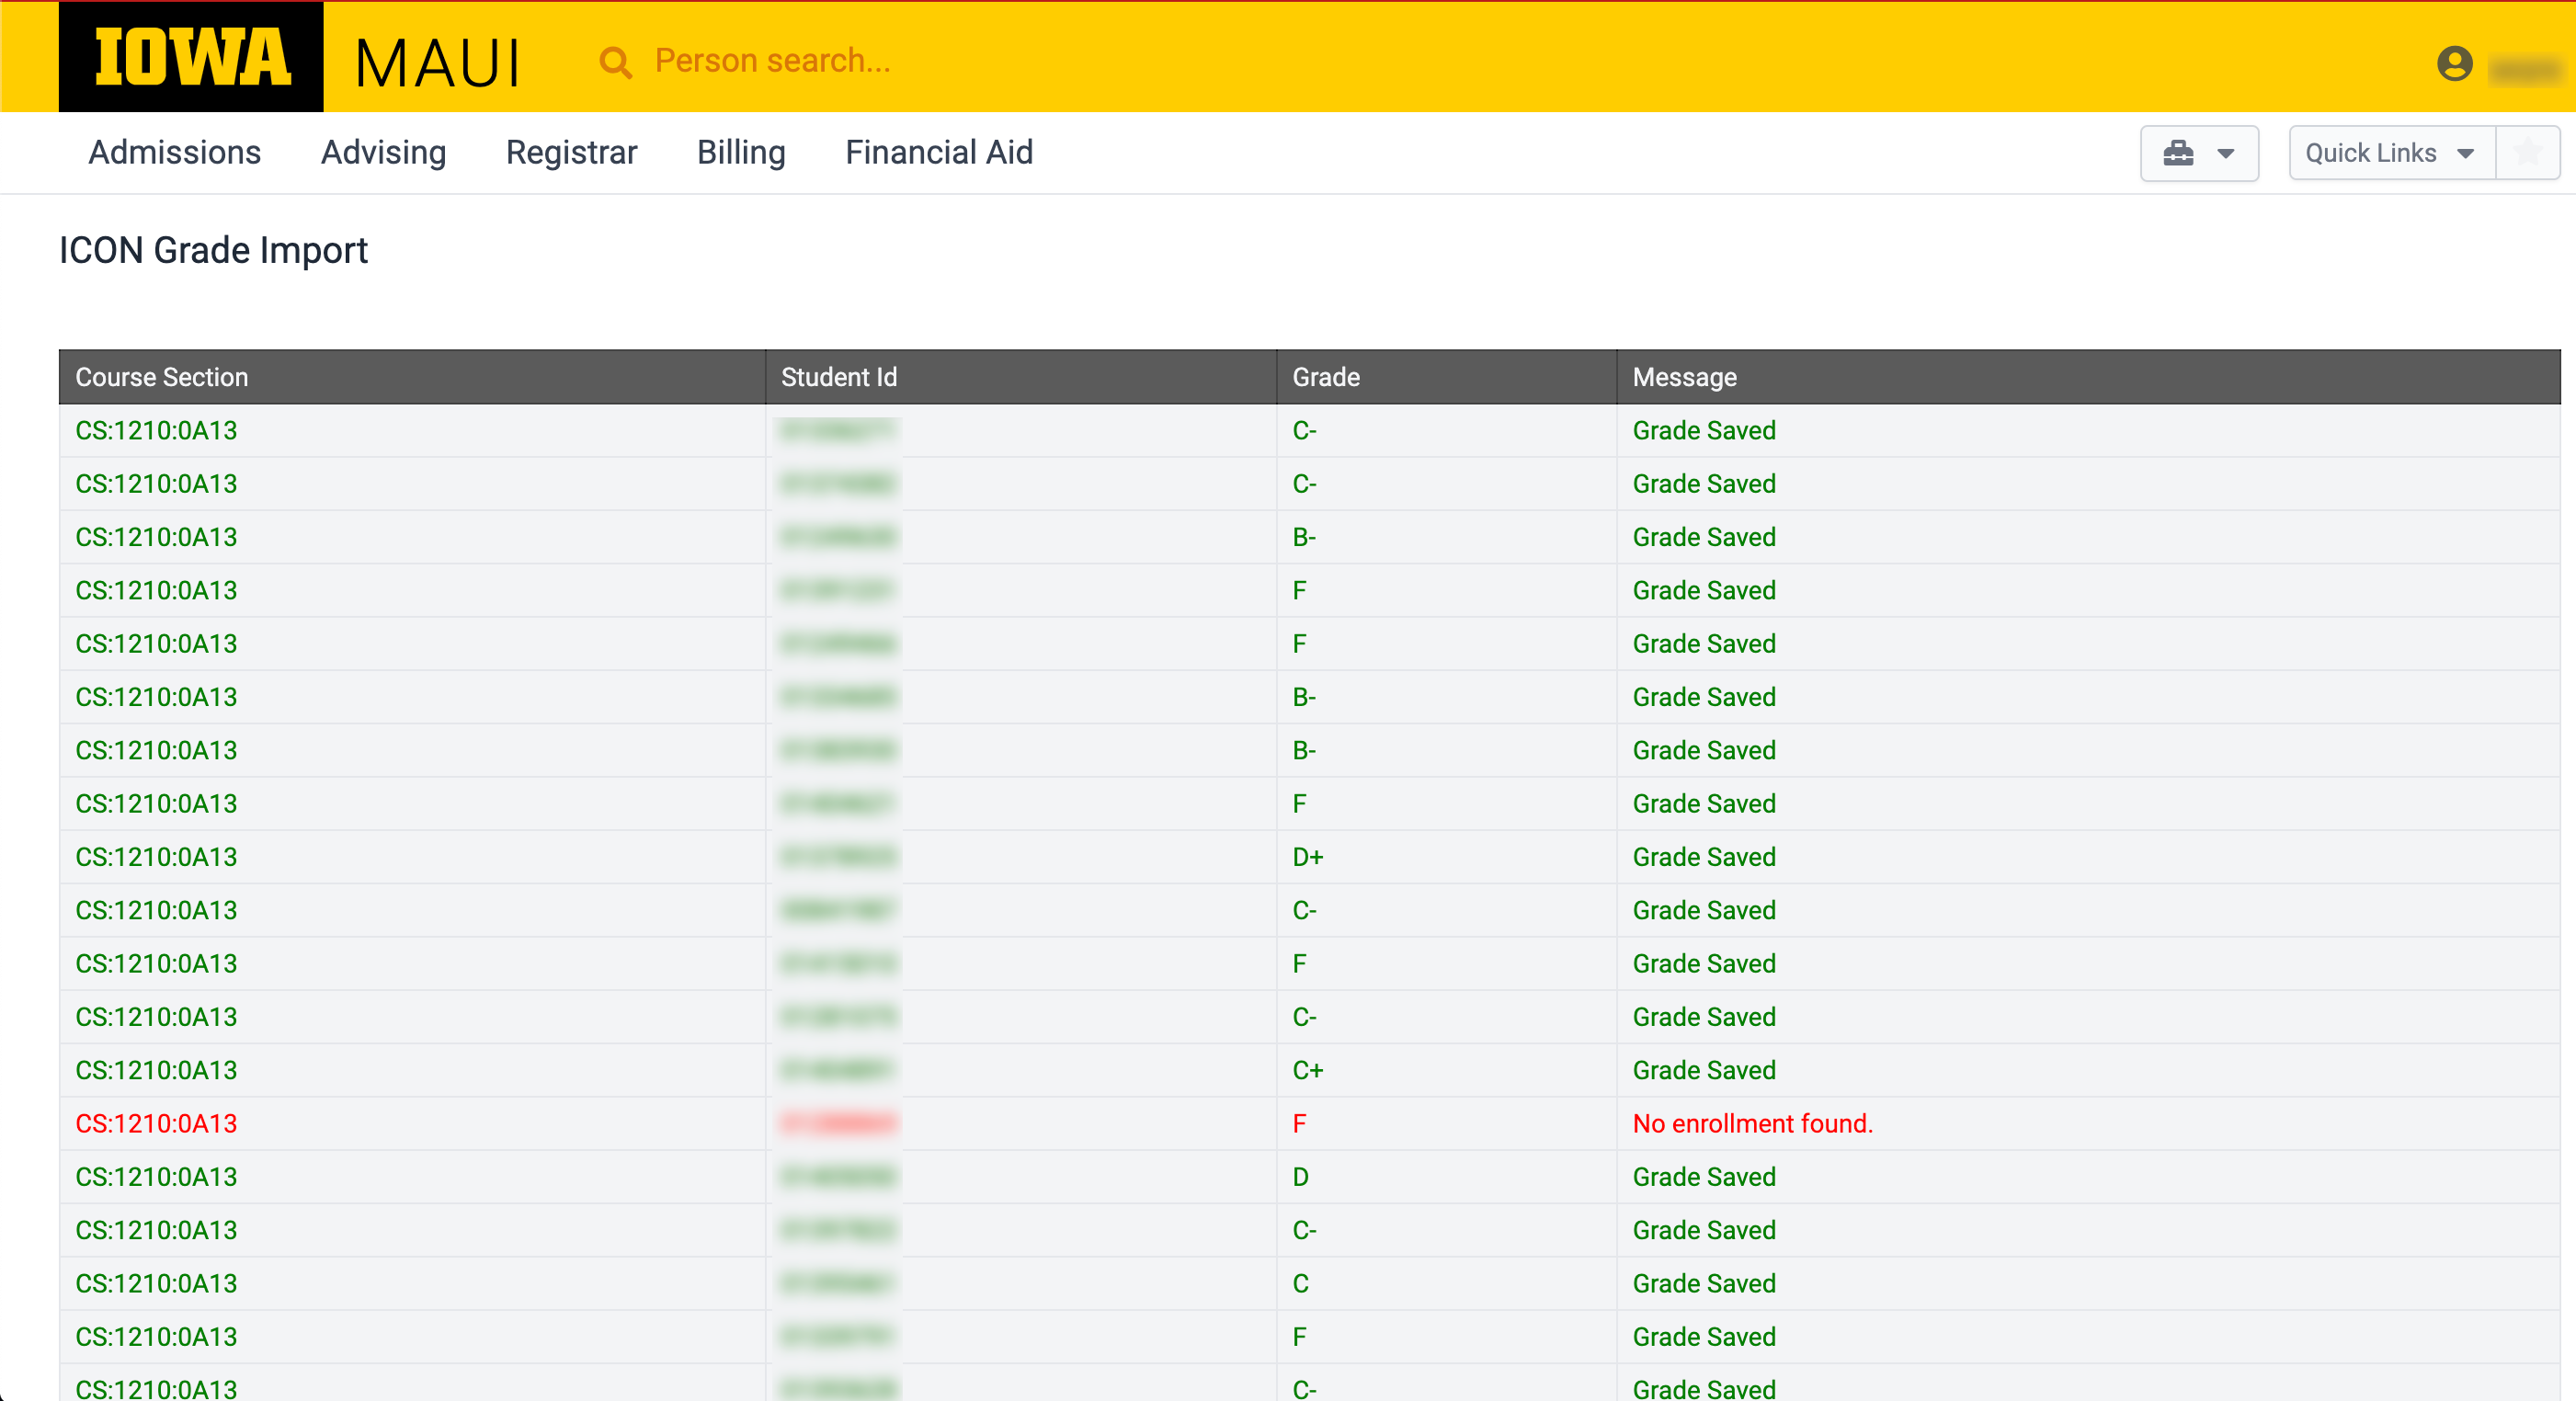
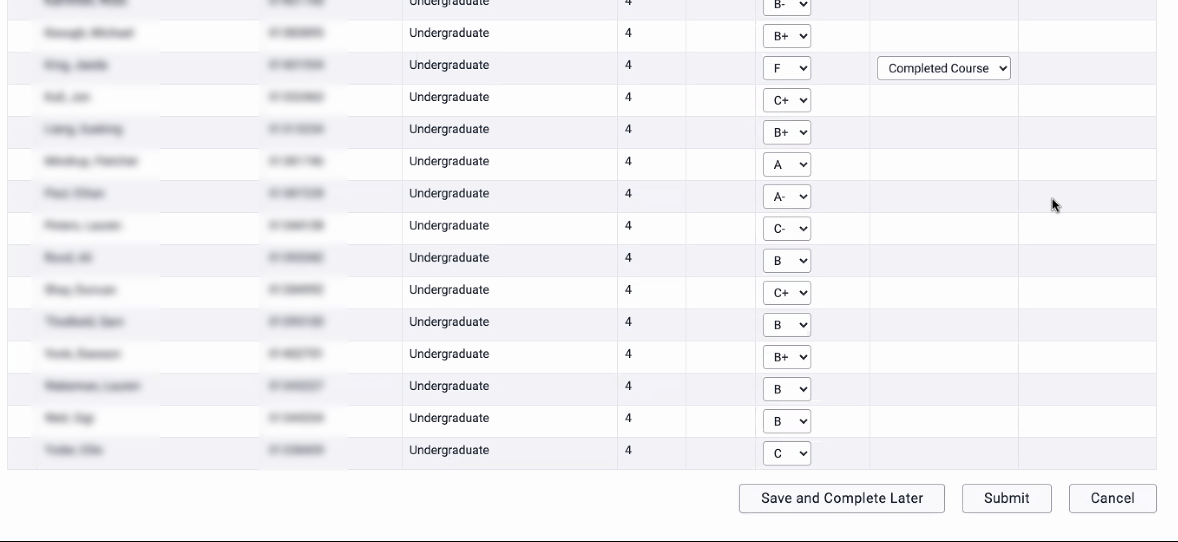
- Scroll to the bottom of the Grade Import list, and click Continue to class list to fix errors and submit grades.

- Edit final grades if necessary and fix any errors. Set the attendance status for students receiving a failing grade. Click Submit to submit final grades to your departmental executive officer for approval. You can also click Save and Complete Later to submit at a later time.
- Once your departmental executive officer has approved the grades submitted, the course's status will change from Submitted to Approved.

How to Remove the Test Student
Please be aware that this step is optional. Accessing Student View at any time creates the Test Student in the Gradebook. If you have multiple sections in your course and want to remove the Test Student, you will need to remove the Test Student from each section.
- Click Settings.
- Click Sections.
- Click on your course section.
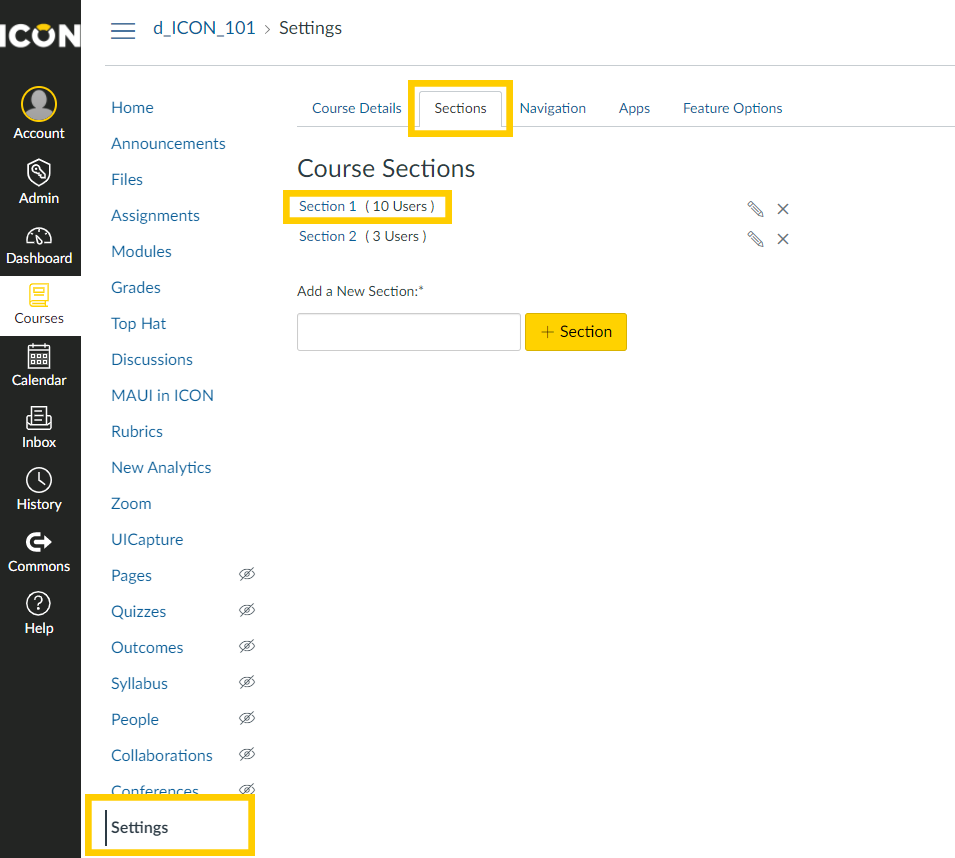
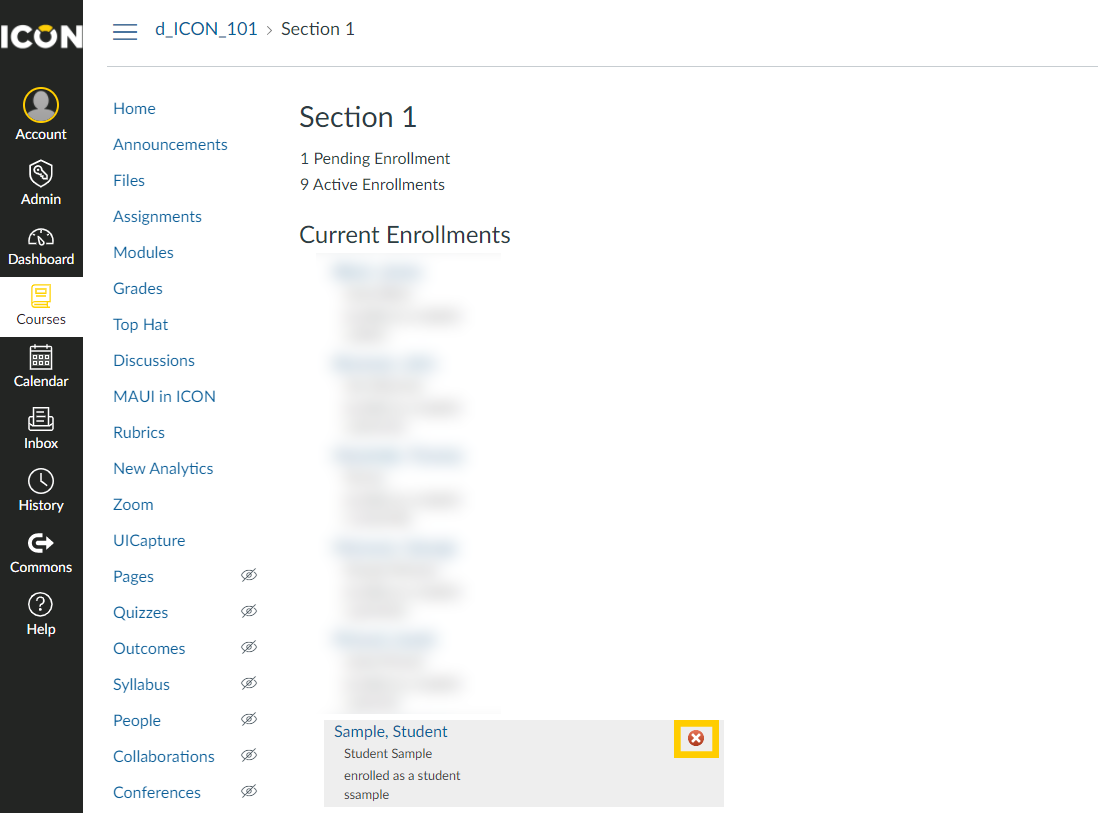
- Scroll through the list of enrolled users until you locate the Student, Test and then click the X to remove it.
Impersonating an Instructor
Note: This is only available for ICON users with the Collegiate Admin L1 role.
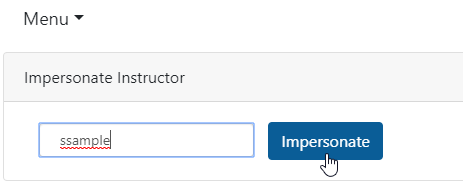
Within the MAUI in ICON menu, you can choose the Impersonate option. This will bring up the Impersonate Instructor box, seen below:
- Simply enter the HawkID of the Instructor you wish to impersonate.
- Click the Impersonate button.
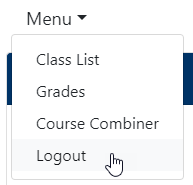
When you want to stop impersonating:
- Click the Menu dropdown list
- Select Logout.
After logging out you will be taken to the tool login page, where you can choose to log in again:
- Click the HawkID Login button to enter in your credential to log in again.
OR
- Click another ICON tool from the Navigation Menu.
- Select the MAUI in ICON tool item in the Navigation Menu.
Third Party Cookies
If you have trouble accessing MAUI in ICON, it maybe be due to your browser settings about third party cookies. If that's the case, you can adjust your browser settings to allow them.